Revit How To Show Two Different Floor Plans Options

Solved Revit Floor Plan Showing Objects From Floor Above Autodesk Community Revit Products

Key Plans In Revit How To Plan Step By Step Instructions Autocad Revit

Revit Tutorials Design Options Revit Tutorial Tutorial Design

Area Plan Area Types How To Plan Areas Type

Revit To Indesign Indesign Diagram Image

Revit Tip Cannot See Underlay Therevitkid Com Tutorials Tips Products And Information On All Things Rev Floor Plans Revit Architecture Revit Tutorial

Then set the exterior finish to be demolished.
Revit how to show two different floor plans options.
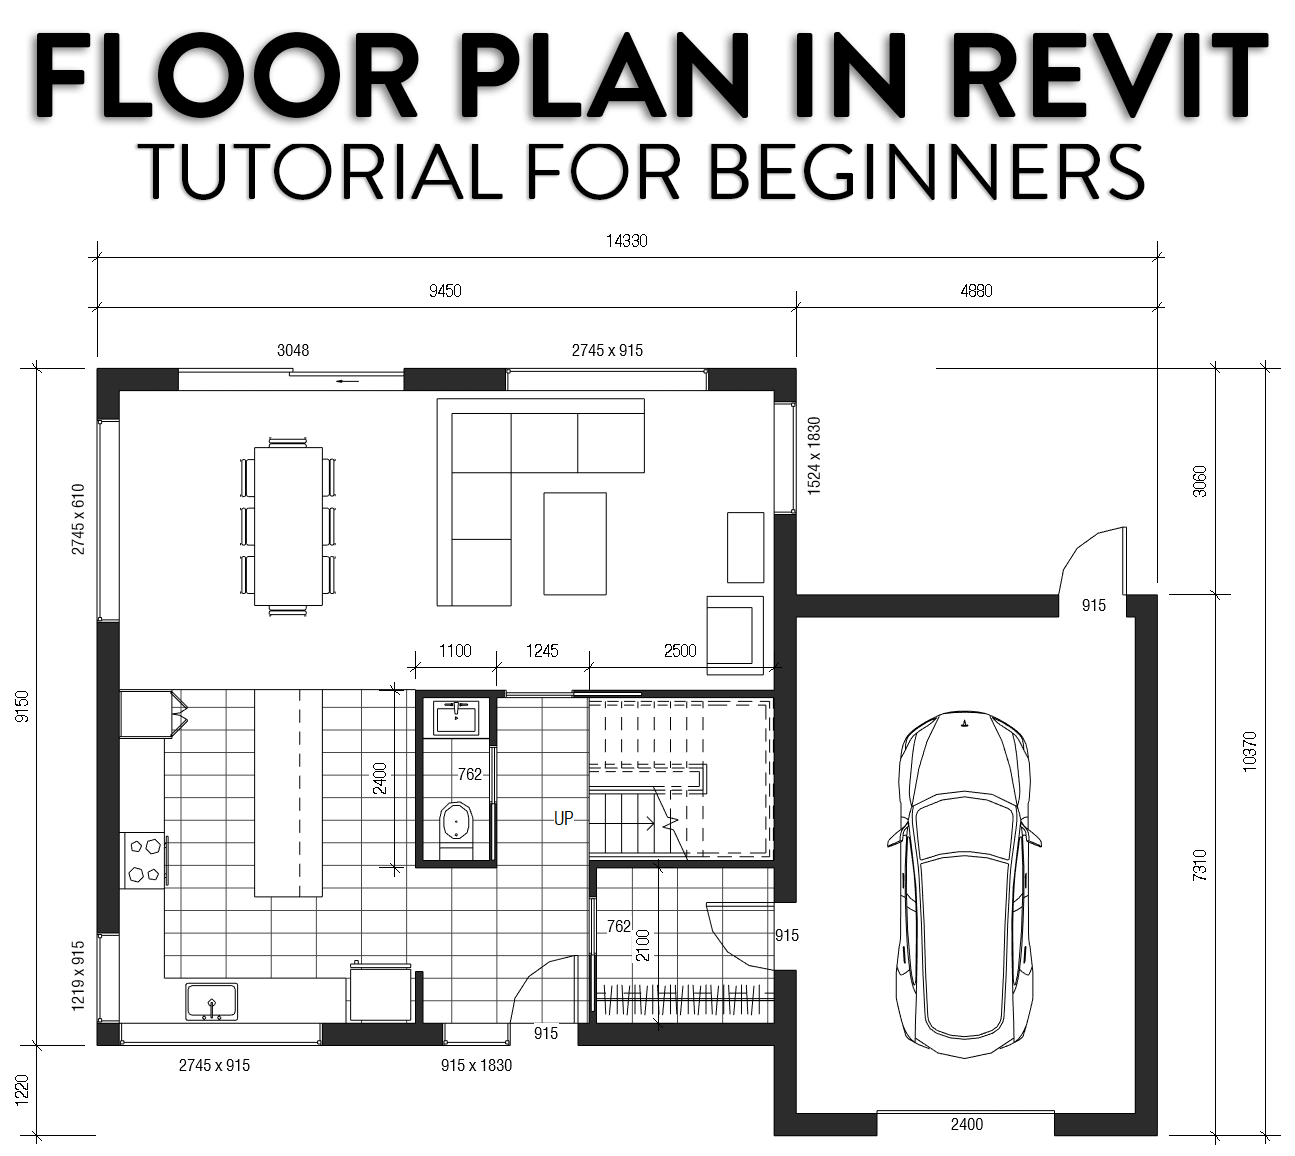
14 Beginner Tips To Create A Floor Plan In Revit Revit Pure

Cool Revit Presentation Plans In 2020 Revit Architecture How To Plan Revit Tutorial

Revit Single Storey Intermediate 13 Floors With Brick Veneer Wall Part 2 Brick Veneer Wall Brick Veneer Brick

Revit Duplicate Views A How To Guide Youtube

Finding Missing Revit Mullions Ideate Design Solutions

Revit Tip Floor Plan And Ceiling Plan View Range Explained Therevitkid Com Tutorials Tips Products And Informati Ceiling Plan Floor Plans How To Plan

Pin Em Revit
Rendered 2d Floor Plans In Revit Tutorial Youtube

Color Fill Legend In A 3d View And See Rooms In 3d In Revit What Revit Wants Views How To Plan Legend
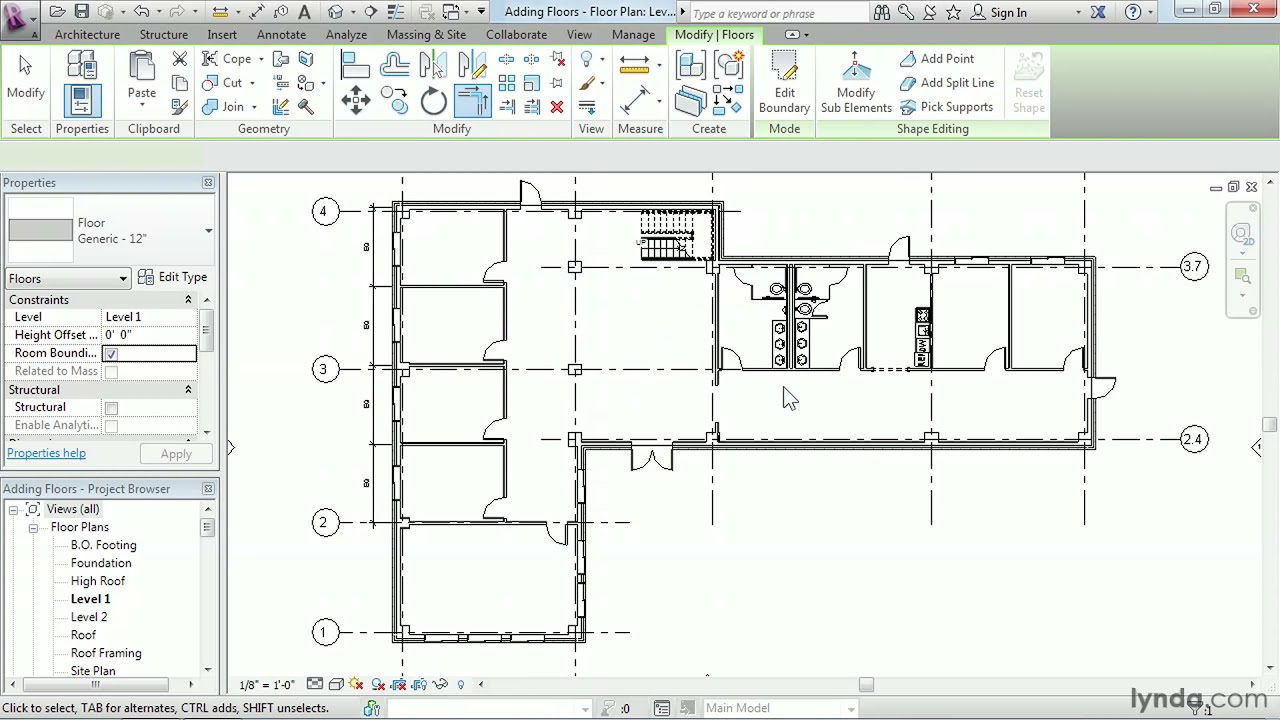
Revit Architecture How To Work With Floors Lynda Com Tutorial Youtube

Flat Roofs In Revit Are A Mystery To Many People Similar To A Lot Of Elements In Revit There Are Many Ways To Go Revit Tutorial Flat Roof Revit Architecture

Adding A Color Fill Plan Revit Architecture Tutorial Revit Tutorial Revit Architecture How To Plan

Revit Wall Tags And Wall Types Legend School Architecture Tags Structure Architecture

Pin By Sunny Porter On For The Home Revit Architecture Architect Software Building Design

Revit House Plans Download Free Best Of House Plans Flats Exhilirate In 2020 House Plans Micro House Plans Ranch Style House Plans

Color Schemes In Reflected Ceiling Plans Ceiling Plan Color Schemes How To Plan

Youtube Scope Box Building Information Modeling Scope Autodesk Revit

Generate Color Legend For Ceiling Heights Revit Dynamo Ceiling Plan Generation Parametric Architecture

Revit Introduction To Wall And Floor Surface Finishes Surface Finish Flooring Wall

Corporate Design Ks Designs Corporate Design Retail Store Design Rendered Floor Plan

Pin On Revit

Graphic Display Options In Revit Tutorial Youtube In 2020 Revit Tutorial Building Information Modeling Revit Architecture

The Bayfield Log Home Floor Plan By 1867 Confederation Log Homes Em 2020 Revit Arquitetura

Eichler Floor Plans In Autodesk Revit Marin Homestead Mid Century Modern House Modern House Floor Plans Floor Plans
Source : pinterest.com
